• SharePoint Designer Error After Latest CUs: Troubleshooting Guide

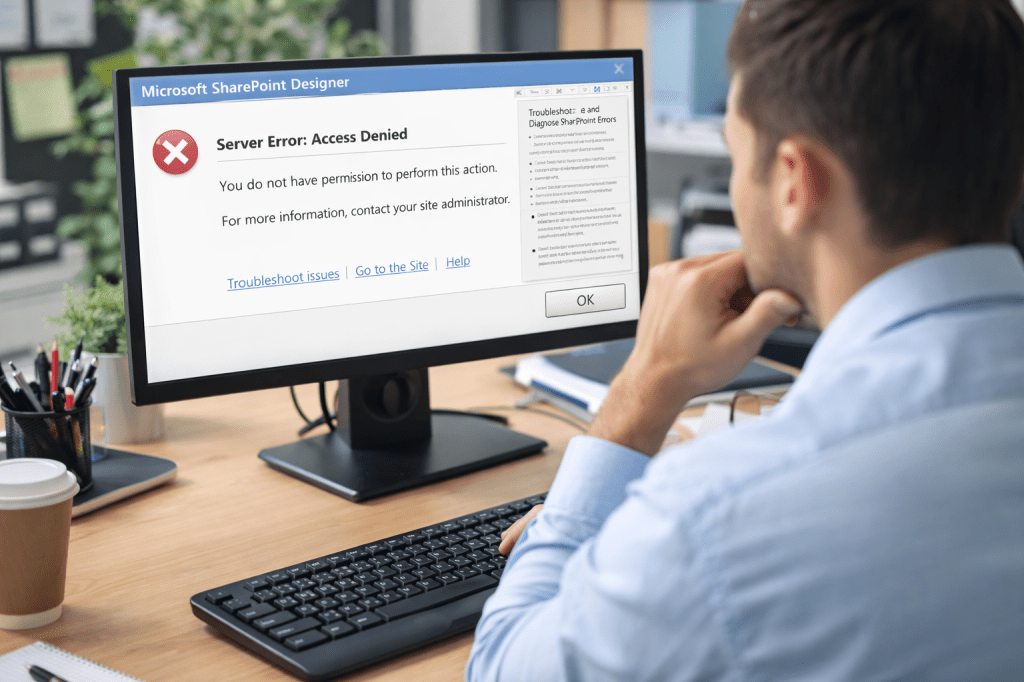
    Description

    A client reported that after installing latest CUs, they are unable to create or modify SharePoint list forms in SharePoint Designer.

    When you are trying to create a new form in SharePoint Designer, you get an error in SPD with message “Could not save the list changes to the server”

    Error popup

    ULS logs

    ULS log on SharePoint Server you will find entries like:

    Failed to GetType for TagMapping tagType xsl:stylesheet.

    Getting Error Message for Exception Microsoft.SharePoint.WebPartPages.WebPartPageUserException: The file you imported is not valid. Verify that the file is a Web Part description file (*.webpart or *.dwp) and that it contains well-formed XML.
    at Microsoft.SharePoint.WebPartPages.WebPartImporter.CreateXdoc(XmlReader reader)
    at Microsoft.SharePoint.WebPartPages.WebPartImporter..ctor(SPWebPartManager manager, XmlReader reader, Uri webPartPageUri, SPWeb spWeb)
    at Microsoft.SharePoint.WebPartPages.WebPartImporter.Import(SPWebPartManager manager, XmlReader reader, Boolean clearConnections, Uri webPartPageUri, SPWeb spWeb)
    at Microsoft.SharePoint.WebPartPages.ToolPane.GetPartPreviewAndPropertiesFromMarkup(Uri pageUri, String webPartMarkup, Boolean clearConnections, SPWebPartManager manager, SPWeb web, MarkupOption markupOption, Boolean bConvertWebPartFormatBehavior, Boolean prependRegisterDirectivesToMarkup, WebPart& frontPagePart, String& markupStorageKey, String& frontPageZoneId, WebPartImporter& webPartImporter, List`1& registerDirectiveDataList, IServerDocumentDesigner& documentDesigner, Boolean blockPropertyTraversal)

    This has now been confirmed as bug in January 2026 CU and Hotfix is currently being developed. There is no workaround for this issue.

    Will keep you posted when I get some additional info on this matter.

    Update 13.4.2026

    • The fix for SP2019 and SPSE for this issue is planned to be included in May 2026 CU.
    • The SP2016 will be released in June 2026 CU.

  • Introduction

    In recent years, SharePoint has been rapidly evolving from a classic document storage platform to a central digital work environment that connects content, processes, and people. With the advent of artificial intelligence, Copilot, and agents, its role is further strengthened – SharePoint is becoming the core knowledge platform in the Microsoft 365 ecosystem. It is this development and the community that we co-create  that the SharePoint Hackathon 2026 is dedicated to, a global online event in which we also participated with the Xnet project – Workstream Oasis.

    What is SharePoint Hackathon 2026

    SharePoint Hackathon 2026 is a two-week online hackathon organized by the Microsoft SharePoint Community. The event is open to a wide range of participants – from business users and designers to IT architects and developers – and encourages the creation of innovative solutions based on modern SharePoint.

    The central theme of the hackathon was “Design, create and share”, with a focus on:

    • the use of artificial intelligence and Copilot,
    • building agents and intelligent experiences,
    • modern design of SharePoint portals,
    • Scalability with SharePoint Framework (SPFx)
    • Integrations with SharePoint Embedded and other Microsoft 365 services.

    The hackathon was not only a competition, but above all a platform for the exchange of knowledge and good practices. Participants presented their solutions in the form of video demonstrations, and Microsoft product owners evaluated the projects according to different categories. A special value of the event was also a series of live broadcasts, where experts from Microsoft presented new functionalities, usage scenarios and the direction of SharePoint development.

    The Challenge of the Modern Digital Work Environment

    When designing our contribution, we started from a very concrete and often present problem in practice:  the dispersion of information. In organizations today, employees work daily with content that is divided between:

    • SharePoint sites and document libraries
    • e-mail‑,
    • Teams chats and channels,
    • Planner, To Do, and other Microsoft 365 apps.

    While these tools are powerful, users often spend a lot of time searching for information, switching between apps, and filtering content that is actually relevant to them. The result is lower productivity and a worse user experience.

    Our goal was therefore to design an intranet solution that:

    • combines information from different sources,
    • adapt them to the individual user,
    • and present them in a transparent, visually appealing way.

    Introducing Xnet – Workstream Oasis

    Xnet – Workstream Oasis is a modern intranet portal built on SharePoint, based on a combination of its own SPFx web parts, the use  of the Microsoft Graph API‑and the  integration of Copilot functionality.

    The basic idea of the solution is to create  an “oasis” in the user’s workflow – a single entry point where the most important information, tasks and content that an individual needs in their everyday life are collected.

    Workstream – the heart of the solution

    The core of the portal is the Workstream Web Part, which displays a personalized aggregated stream of information on the SharePoint home page. This flow brings together content from different Microsoft 365 sources and tailors it based on the user’s context.

    Instead of having to search for documents, conversations, or notifications on their own, Workstream offers a structured overview of the most important information in one place. This reduces the cognitive load and improves focus on the actual work.

    Quick Survey – one-call surveys

    To complement the basic functionality, we have also developed the Quick Survey web part. This allows for extremely fast creation of surveys using the Copilot API‑yes. The user can create an entire survey with a single text prompt, without manually defining questions and answers.

    Such an approach significantly speeds up the collection of feedback in the organization, whether for internal research, employee opinions or quick decision-making processes.

    Weekend Relief – work-life balance

    When developing the solution, we wanted to show that an intranet is not necessarily limited to work content. That’s why we’ve also added a slightly more playful Weekend Relief widget that suggests ideas for leisure activities for users.

    With this building block, we wanted to highlight the importance of employee well-being and work-life balance, which is an increasingly important topic in modern digital work environments.

    Technological aspect and categories of hackathon

    The Xnet – Workstream Oasis project was designed as a modular and scalable solution based on modern SharePoint technologies. Using SPFx allows for deep integration with the SharePoint user interface, while providing flexibility in developing additional functionality.

    The solution was submitted to several categories of the SharePoint Hackathon, including:

    • SharePoint Site,
    • SharePoint Framework (SPFx),
    • SharePoint + Agents.

    Such a wide range of categories also reflects the purpose of the solution – to demonstrate how SharePoint can function as a central platform for modern, intelligent and user-centric digital experiences.

    Conclusion

    By participating in the SharePoint Hackathon 2026, we wanted to show how it is possible to create an intranet that goes beyond classic portals using existing tools and new AI capabilities. Xnet – Workstream Oasis is an example of how SharePoint can become an active user assistant and not just a passive content repository.

    The hackathon reaffirmed that the SharePoint community has tremendous potential for innovation and that the combination of technology, good design and user understanding leads to solutions with real added value. For us, the project was also an opportunity to experiment, learn and exchange experiences – which is ultimately the essence of the hackathon.

  • When securing a SharePoint Server farm (2016, 2019, or Subscription Edition), the best starting point is always Microsoft’s official security hardening documentation. The primary resource — “Plan security hardening for SharePoint Server” — provides clear recommendations for reducing the attack surface while keeping the farm functional.

    Key Hardening Steps We Followed from Microsoft Documentation

    We strictly followed Microsoft’s guidance, including:

    • Least-privilege configuration for service accounts and application pools.
    • SQL Server hardening: Blocking default SQL ports (TCP 1433 and UDP 1434) where possible and using SQL Server client aliases for farm communication. This is one of Microsoft’s primary recommendations to prevent direct database exposure between farms or from external networks.
    • Restricting unnecessary services and features.
    • Enabling Windows Firewall rules only for required traffic.
    • Keeping the environment fully patched and rotating ASP.NET machine keys (especially important after recent vulnerabilities).

    Microsoft emphasizes securing inter-server communication within the farm. The documentation lists specific ports for service applications and Windows Communication Foundation (WCF):

    • TCP 32843 (HTTP binding – default for service apps)
    • TCP 32844 (HTTPS binding)
    • TCP 32845 (net.tcp – only if used by third-party service apps)
    • TCP 808 (WCF)

    It also stresses proper firewall configuration between SharePoint servers, the database tier, and other components.

    The Unexpected Discovery: Ports 135 and 445 Are Required Between SharePoint Servers

    While implementing strict firewall rules based on the official docs, we encountered intermittent issues with farm functionality — timer jobs failing, service applications not responding reliably, search crawling problems, and occasional Distributed Cache or profile synchronization hiccups.

    After careful troubleshooting and packet analysis, we found that TCP ports 135 (RPC Endpoint Mapper) and 445 (SMB) needed to be opened between all SharePoint servers in the farm for normal operation.

    These ports are not always prominently highlighted in the SharePoint-specific hardening article for intra-farm traffic, but they are essential for several underlying Windows components that SharePoint relies on:

    • Port 135 (RPC): Used by DCOM, WMI, and various remote procedure calls for management, configuration synchronization, and inter-server coordination.
    • Port 445 (SMB): Required for file sharing operations, named pipes (even when SQL uses aliases), administrative shares during certain operations, and core Windows services like Netlogon.

    This aligns with broader Microsoft documentation on Windows network port requirements and real-world SharePoint deployments. Many administrators discover this only during hardening or when applying aggressive firewall policies.

    Important note: These ports should still be tightly restricted — allow them only between SharePoint servers in the same farm (and to the SQL server where necessary), never to the general internal network or internet. Use IP-based firewall rules or network segmentation for maximum security.

    Lessons Learned and Recommendations

    1. Start with Microsoft’s official hardening guide and cross-reference the general “Service overview and network port requirements for Windows”.
    2. Test thoroughly in a staging environment after applying firewall restrictions. Many “hidden” dependencies surface only under load.
    3. Document your exact allowed ports and rules — this helps during audits and future troubleshooting.
    4. Combine network hardening with other layers: regular patching, AMSI integration, least-privilege accounts, and monitoring for anomalous activity.

    By following Microsoft’s documentation while validating real-world behavior, we achieved a significantly hardened SharePoint farm without breaking core functionality. The key takeaway? Official port lists are an excellent foundation, but always validate intra-farm communication empirically — especially for RPC (135) and SMB (445).

    Here is the PowerShell script I use to set firewall exceptions:

    $remoteAddresses="10.10.10.93","10.10.10.94"
    New-NetFirewallRule -DisplayName "SharePoint Inbound" -Direction Inbound -Protocol TCP -Enabled True -Action Allow -LocalPort "135","445","16500-16519","22233-22236","808","32843-32846","49152-65535","1025-5000" -RemoteAddress $remoteAddresses

    If you’re planning a similar hardening project, budget time for testing these two ports. They’re often the difference between a “secure but broken” farm and a secure, reliable one.

  • Introduction

    In an age where artificial intelligence (AI) is becoming an indispensable part of business processes, Microsoft is introducing innovations that make it easier to manage digital content. SharePoint Knowledge Agent, introduced in public preview in September 2025, is an AI assistant integrated directly into SharePoint that helps enrich, organize, and maintain content. It’s designed to prepare data for Microsoft 365 Copilot and other agents, providing more reliable responses and better productivity. As part of the SharePoint ecosystem, the agent automatically structures metadata, corrects errors, and suggests improvements, which is critical for organizations with large volumes of documents. In this article, we focus on three key functionalities: organizing the document library, setting rules, and creating new views that the agent allows technical users to work more efficiently.

    Organize your document library with AI-assisted

    One of the strongest advantages of Knowledge Agent is its ability to automatically organize document libraries. In traditional SharePoint environments, managing large collections of documents is often time-consuming, requiring manual metadata addition, categorization, and filtering. The agent simplifies this by using AI to analyze content and automatically generate columns with metadata such as categories, expiration dates, or keywords extracted directly from documents.

    The process starts with accessing the agent in the lower-right corner of the SharePoint interface (requires a Microsoft 365 Copilot license and enabling preview by an administrator). The user can enter a natural language command, for example: “Organize this library by contract type and expiration date.” The agent then reviews the documents, extracts relevant information—such as invoice numbers, dates, or customer names—and enters it into new columns. This is especially useful for libraries with hundreds or thousands of documents, where manual processing is not feasible.

    For example, in an invoice library, an agent can create columns for “Account Number”, “Amount”, and “Due Date”, using AI to read PDF or Word files. Previewing changes allows you to review and edit before committing to reduce the risk of errors. According to Microsoft’s documentation, this functionality improves search and filtering by up to 50% by making content “Copilot-ready”. For technical users, it is important to know that the agent supports integration with existing columns and can automatically populate values using models such as Azure AI without the need for additional scripts.

    In my case, where I currently have SharePoint documents stored in my document library, the Knowledge agent suggested the following columns:

    I can then save my changes to the library, and the suggested columns can become part of an existing view or select a new one.

    Set up rules to automate processes

    Knowledge Agent revolutionizes natural language rule-making, which is ideal for IT professionals who want to automate routine tasks without coding. Compared to classic Power Automate flows, the agent allows you to quickly define rules directly in SharePoint, such as automatic archiving of outdated documents or change notifications.

    To set up a rule, open the agent interface and enter a command, such as: “Set a rule to move expired documents to the archive folder.” The agent interprets the request, suggests parameters (e.g., date condition, target location), and generates a rule in the background using the Microsoft Graph API. Rules can include metadata-based conditions such as “if the category is ‘Contract’ and the expiration date is less than today, move to ‘Archive’ and send an email to the owner.”

    Technically, an agent uses AI models to understand context, which means it supports complex logics such as AND/OR conditions or integrations with other Microsoft 365 services. Administrators can review the rules in the SharePoint settings panel, where they are displayed as JSON objects for advanced editing. This is especially useful in large organizations where rules help maintain compliance, for example, by automatically deleting documents after a certain retention period.

    When we want to use the “Set up rules” option, it is also necessary to enter instructions to the AI Agent, where we can combine different types of tasks. In the event that we refer to fields that do not yet exist, AI agnet will suggest creating new fields, and then a pop-up window will appear where we can set up classic SharePoint notification rules.

    Create new views with the help of the agent

    The Knowledge Agent makes it easy to create customized views, which are crucial for visualizing and filtering data in libraries. Instead of manually configuring filters in the SharePoint interface, users can use AI to generate views based on metadata.

    The process is simple: In the agent’s chat, type “Create view for agreements, filtered by expiration date and category.” The agent analyzes existing columns, suggests filters (e.g., “Expiration date > today” and “Category = NDA”), and creates a new view that can be saved as default or shared.

    For a technical audience, it is important that the agent supports CAML (Collaborative Application Markup Language) behind the scenes, which allows views to be exported to XML for scripting. In addition, the agent can optimize views for performance by suggesting indexes on columns.

    Conclusion: The Future of Knowledge Management

    SharePoint Knowledge Agent represents a step forward in the integration of AI into the daily work of IT professionals. By organizing libraries, setting up rules, and creating views, the agent not only streamlines processes but also ensures that content is ready for future AI applications. Although it is still in the preview phase, its potential to increase efficiency is enormous.

  • In a fast-paced business environment where information is the key to success, effective document and content management in SharePoint is becoming increasingly important. Imagine a tool that automatically organizes your files, fixes errors, and makes them more accessible—all powered by artificial intelligence (AI). That’s exactly what the new SharePoint Knowledge Agent feature, which is currently available in preview, brings.

    Knowledge Agent isn’t just another feature; is your personal AI agent in SharePoint, acting as an intelligent assistant. It was developed for the Microsoft 365 environment and is optimized to work with Copilot – an AI tool that is already revolutionizing the way we search and create content. In the preview, available from September 2025, you can start using it immediately if you have the appropriate license.

    What does SharePoint Knowledge Agent do?

    Knowledge Agent is a built-in AI capability in SharePoint that helps organizations prepare content for use in AI environments. Its main purpose is to enrich, organize, and maintain your SharePoint content in a structured, reliable form that’s optimized for Microsoft 365 Copilot agents. Think of it as a virtual librarian who not only sorts books, but also summarizes them, corrects the index, and suggests new connections.

    Key features include:

    • Automatic content enrichment: The agent analyzes your documents, pages, and files and automatically adds relevant metadata such as keywords, categories, or summaries. This means that your projects or reports become easier to find – without manual editing.
    • Metadata Optimization: It helps in tagging files with appropriate tags, which improves search and filtering. For example, if you have a library with thousands of sales documents, the Agent will suggest labels like “Q4 2025” or “Europe,” which makes it easier to analyze.
    • Intelligent page summarization: Create short, clear summaries of long-form pages or documents that are useful for quick reference. This is ideal for meetings where you need to quickly review key points.

    For business users, this means less time searching for information and more time making decisions. The agent not only cleans up the “untidy” parts of your SharePoint, but also prevents errors such as broken links or outdated pages. And integration with Copilot ensures that your answers in AI conversations are accurate and relevant – without the risk of incorrect data. In practice, Agent reduces the time spent organizing content by up to 30%. This is especially useful in teams where documents accumulate quickly, such as in marketing or HR departments.

    How to set up Knowledge Agent in preview?

    Setting up the Knowledge Agent in preview is simple, but requires administrator privileges. If you’re an administrator (or have access to an IT team), follow these steps. The process is based on PowerShell commands using the “SharePoint Online PowerShell Module”

    Prerequisites

    Before you begin, check:

    • You have a Microsoft 365 Copilot license (required for all users).
    • Install SharePoint Online Management Shell (version 16.0.26615.12013 or later). You can download it for free from the Microsoft Download Center or by using the Install-Module -Name Microsoft.Online.SharePoint.PowerShell command.
    • You have administrator access to SharePoint Online (as a global administrator or SharePoint administrator).

    Steps to set up

    1. Connect to the SharePoint admin center: Open PowerShell and enter the command:

    Connect-SPOService https://vaš-tenant-admin.sharepoint.com

    1. Enable the Knowledge Agent: Use the Set-SPOTenant command with the parameters for the scope, as shown in the following examples:
    2. Check the setting: Enter Get-SPOTenant | Select-Object KnowledgeAgentScope, where you can check the currently included settings.

     If you’re having problems with a version of a PowerShell module, first update by using the command Update-module -Name Microsoft.Online.SharePoint.PowerShell

    What does the Knowledge Agent enable?

    Knowledge Agent is not just a tool for administrators, it is a tool that you can use every day to simplify your work.

    • Quick search and summaries: When you open a page or document, click the Agent button in the corner. Ask him: “Summarize the key points of this report” or “Find related files on the topic of ‘sales 2025′”. Responses are immediate and tailored to your content.
    • Library organization: The agent automatically detects broken links or stale files and marks them for review. This saves you hours of manual verification – ideal for teams that share large volumes of documents.
    • Collaborate with Copilot: When you use Copilot in Teams or Outlook, the agent will ensure that the suggestions are based on your optimized content. For example, when preparing a presentation, Copilot will suggest relevant slides from your SharePoint library.

    Practical tips:

    • Start small: Enable the Agent in one place (e.g., your project page) and watch it enrich the metadata. After a week, you’ll see an improved search experience.
    • As a page owner, invite colleagues and show them how to use the Quick Summaries Agent button – this will boost team efficiency.
    • Track changes: The agent keeps track of changes, so check your summaries regularly to stay on top of what’s new in your content.

    A step towards a smarter SharePoint

    The SharePoint Knowledge Agent in preview represents an important step towards AI content management. By enriching your documents, fixing errors, and quick summaries, it allows you to focus on what really matters: leveraging SharePoint functionality without knowing SharePoint to the core. For additional questions or personalized advice, please contact Kompas Xnet.

    In the next Dot, we can take a closer look at the functionalities of the Knowledge Agent, namely:

    • How to proceed with the rules
    • And how to create new views with the help of an agent.
  • Introduction

    In light of the increasing number of cyberattacks, intrusions, and security vulnerabilities targeting on-premises environments, Microsoft has implemented robust protection mechanisms for SharePoint Server. A key feature is the integration with the Antimalware Scan Interface (AMSI), which provides real-time protection against malicious web requests. This article discusses AMSI in the context of SharePoint Server 2019 and SharePoint Subscription Edition:

    • It covers an explanation of what AMSI is.
    • How to enable or disable AMSI.
    • A detailed description of the operation and integration with Windows Defender.
    • Test scenarios.
    • Protective capabilities against exploitation.
    • Compare antivirus products that support AMSI integration with SharePoint.

    What is AMSI?

    Antimalware Scan Interface (AMSI) is a versatile standard that Microsoft introduced with Windows 10 and Windows Server 2016. It allows applications and services to integrate with any antivirus product installed on the system for a deeper overview of dynamic content such as scripts, memory streams, and web requests. The main purpose of AMSI is to combat documentless malware, obfuscated scripts and other non-traditional threats that avoid classic file scanning.

    According to Microsoft, AMSI allows applications to submit content for review before execution or processing. It supports techniques such as file scanning, memory/stream analysis, and URL/IP address reputation checks. AMSI also enables session-based correlation, which allows antivirus vendors to link multiple requirements to detect fragmented malicious content. It is integrated into Windows components such as PowerShell, Windows Script Host, JavaScript/VBScript, and Office VBA macros, ensuring early interception of potentially harmful content.

    In SharePoint Server, AMSI integration specifically scans HTTP and HTTPS requests to prevent malicious exploits from reaching endpoints. This is crucial for on-premises installations, where vulnerabilities such as Remote Code Execution (RCE) can be exploited before patches are installed. Starting with SharePoint Subscription Edition 25H1, AMSI also includes review of request bodies, which improves detection in contents.

    Enable and disable AMSI in SharePoint 2019 and Subscription Edition

    AMSI integration is available in SharePoint Server 2019 (build 16.0.10396.20000 or later) and SharePoint Subscription Edition (version 22H2 or later). The prerequisites include Windows Server 2016 or later, an AMSI-compatible antivirus solution such as Microsoft Defender Antivirus (version 1.1.18300.4 or later), and appropriate security updates.

    Via user interface (Central Administration)

    For SharePoint 2019 or earlier Subscription Editions:

    1. Open SharePoint Central Administration.
    2. Go to Manage apps > Manage web apps.
    3. Select the web app and click Manage features.
    4. On the SharePoint Server Antivirus screen, select Activate to enable or Deactivate to disable.

    For Subscription Edition version 25H1 or later:

    1. Go to AMSI Security > Configuration.
    2. Select the web app.
    3. Enable AMSI by selecting “Enable AMSI Scan Function” (scans headers); disable by selecting “Completely disable the AMSI scan function”.
    4. If enabled, configure request body scanning:
      • Off: No body scanning.
      • Balanced Mode: Scans predefined sensitive endpoints and user-defined included points.
      • Full Mode: Inspects all endpoints except the excluded ones.
    5. Add the included/excluded endpoints (e.g., /SitePages/Home.aspx) and click OK.

    As of the September 2023 security updates, AMSI is enabled by default for all web applications. Each web application must be configured individually, and changes may require a restart of IIS.

    Via PowerShell

    To enable AMSI for a web application:

    Enable-SPFeature -Identity 4cf046f3-38c7-495f-a7da-a1292d32e8e9 -URL <URL of the web application>

    To disable:

    Disable-SPFeature -Identity 4cf046f3-38c7-495f-a7da-a1292d32e8e9 -URL <URL of the web application>

    To scan your body in Subscription Edition 25H1 or later:

    • Set the mode (0=Off, 1=Balanced, 2=Full):

    $webApp = Get-SPWebApplication -Identity “http://primer&#8221;

    $webApp.AMSIBodyScanMode = 2

    $webApp.Update()

    • Manage endpoints (for Balanced: AddAMSITargetedEndpoints; for Full: AddAMSIExcludedEndpoints).

    Detailed description of how AMSI works and integration with Windows Defender

    AMSI acts as a bridge between applications (such as SharePoint) and antivirus providers. When a request arrives, SharePoint sends the content—headers and, in advanced modes, the body—to AMSI. AMSI forwards this to a registered antivirus program for review. If the content is malicious, the request is blocked; otherwise, the processing continues.

    Integration with Microsoft Defender Antivirus (MDAV) improves this process. MDAV uses AMSI to review script-based attacks, including obfuscation, through heuristics, behavior monitoring, and machine learning models. It detects threats such as reflective DLL injection, WMI persistence, and coded shellcodes. It supports languages such as PowerShell, JScript, VBScript, and .NET assemblies. MDAV scans in real-time, periodically checks WMI repositories, and blocks undocumented malware that exploits tools such as PowerShell.

    In SharePoint, this means that incoming requests are reviewed before they are processed, preventing exploits. For example, in full mode, all endpoints are protected except the excluded ones, which balances security and performance. MDAV is automatically enabled on Windows Server and works flawlessly without additional tools, although third-party providers can also register.

    Test scenarios for AMSI in SharePoint

    To verify the operation of AMSI, use test strings that trigger detection without damage. The standard AMSI test pattern is “amsiscantest:x5opap4pzx54p7cc7-standard-antivirus-test-fileh+h*”.

    In the browser

    1. Make sure AMSI is enabled and MDAV is active.
    2. Add a test string as a query parameter to a SharePoint URL, such as https://servername/sites/sitename?amsiscantest:x5opap4pzx54p7cc7-standard-antivirus-test-fileh+h*.
    3. If AMSI is working, the request will be blocked with an error (e.g., 400 BAD REQUEST). If not, the request usually continues.

    Alternatively, add the string as an HTTP header (e.g., X-Test-Header) using browser tools such as the Developer Console or extensions.

    Via PowerShell

    1. Use Invoke-WebRequest to simulate the request:

    $headers = @{ ‘X-AMSI-Test’ = amsiscantest: x5opap4pzx54p7cc7-standard-antivirus-test-fileh+h*’ }

    Invoke-WebRequest -Uri “http://sharepoint/stran&#8221; -Headers $headers -Method Get

    The claim should look like the example below:

    GET /sites/sitename HTTP/1.1

    Host: servername

    amsiscantest: x5opap4pzx54p7cc7$eicar-standard-antivirus-test-fileh+h*

    1. If AMSI is active, expect a block or error. Check SharePoint logs or Defender alerts for confirmation.
    2. To test the body (in Full/Balanced mode), send a POST request with the test string in the body.

    If the block does not occur, check the AMSI status via Get-MpPreference in PowerShell or the Health Analyzer in Central Administration.

    How AMSI protects SharePoint servers from hacker attacks

    AMSI acts as a proactive protection against vulnerabilities by detecting malicious requests. For example, in CVE-2025-53770 (a deserialization vulnerability that enables unauthenticated remote code execution), attackers send specially crafted requests to exploit endpoints such as ToolPane.aspx. AMSI scans these requests, detects and blocks malicious content before execution, thereby preventing the installation of web shells or the export of data.

    Other examples include CVE-2025-53771 (related to the above for privilege escalation) and legacy exploits targeting Exchange/SharePoint. Microsoft reports that AMSI terminates active campaigns by blocking malicious HTTP requests, even before patches. In real-world attacks, such as those with obfuscated scripts or no documented techniques, AMSI detects anomalies in conjunction with Defender through behavior monitoring, reducing the risk of intrusions in critical sectors.

    Comparison of antivirus products and a list of those that support AMSI integration with SharePoint

    Antivirus products differ in AMSI support: some focus on real-time scripts (e.g., PowerShell), others on endpoint protection with SharePoint-specific features. Microsoft Defender offers seamless, built-in integration at no additional cost, using machine learning for broad threat detection, but may not have specialized SharePoint dashboards. Third parties offer advanced forensics, centralized management, and customized rules, but require configuration and licensing.

    Key comparison:

    • Depth of Detection: Defender excels at undocumented threats; products like McAfee/Symantec add URL and network reputation analysis.
    • Performance: Balanced AMSI modes reduce overhead; heavier products like Kaspersky can affect high-traffic servers.
    • Ease of integration: All AMSI-compatible are automatically registered; SharePoint-specific ones, such as Symantec, offer plugins for AI.
    • Cost: Defender is free with Windows; others are subscription-based.

    List of products that support AMSI (verified through Microsoft documents, provider websites, and compatibility lists):

    • Microsoft Defender Antivirus (native, real-time protection for scripts and requests).
    • ESET Security for Microsoft SharePoint (Enhanced Malware Protection, AMSI for scripts/data).
    • Symantec (Broadcom) Protection for SharePoint Servers (HTTP request scanning, all-in-one integration).
    • Trend Micro Server & Workload Protection (leverages AMSI for script detection).
    • McAfee Endpoint Security (blocks widespread threats like PowerMiner via AMSI).
    • Kaspersky Endpoint Security (sends objects such as PowerShell scripts for review).
    • Bitdefender (a bridge to protect against undocumented threats via AMSI).
    • Sophos Home/Endpoint (protects against stealthy script attacks).
    • WithSecure (F-Secure) Policy Manager (deeper review of scripting services).
    • CrowdStrike (combines with Defender for AMSI registration).

    For SharePoint, choose those with explicit support for reviewing HTTP requests. Always check the providers’ websites for compatibility.

    Conclusion

    AMSI integration strengthens SharePoint against evolving threats by ensuring the security of on-premises environments. By enabling AMSI and using compatible antivirus solutions, administrators can effectively mitigate risks. For updates, see Microsoft Learn.

  • In today’s digital environment, managing SharePoint effectively is critical to ensuring security, compliance, and optimal use of data. By leveraging the advanced features of Microsoft 365 Copilot and SharePoint Advanced Management, organizations can reduce the risk of oversharing, improve access control, and optimize search experiences. In this article, we’ll review the configuration steps and recommendations for advanced SharePoint management.

    1. Prepare SharePoint for integration with Copilot

    To successfully integrate Microsoft 365 Copilot into SharePoint Online, it’s critical that sharing and access settings are configured correctly. This reduces the risks associated with unauthorised access or inadvertent disclosure of sensitive data.

    Steps to proceed:

    To update tenant-level sharing settings:

    • Disable broad-based rights such as “Everyone except external users” to prevent uncontrolled sharing.
      • Use the PowerShell command:
      • Set-SPOTenant -ShowEveryoneExceptExternalUsersClaim $false
      • This command removes the ‘Everyone except external users’ option from the people selector, which reduces the risk of oversharing.

    To enable restricted search in SharePoint:

    or use a CSV file:

    Add-SPOTenantRestrictedSearchAllowedList -SitesListFileUrl C:\Users\admin\Downloads\UrlList.csv

    • This ensures that only approved seats appear in the organizational search and Copilot experience
      • What you need to be careful about here is because it also limits the search engine’s access to SharePoint sites, which means that search results are not displayed from these sites.

    To set access requirements at the site level:

    • Enable site-specific access requests for site owners to review and grant access.
      • You can set this up in the SharePoint admin center under each site’s settings.

    Verification of permissions and access:

    • Regularly check permissions and access to sites in the SharePoint admin center to ensure that privileges are assigned correctly.

    Recommendations:

    • Regularly review and update your sharing settings to prevent accidental oversharing.
    • Involve site owners in the access granting process to ensure accountability.

    Figure 1: SharePoint admin center for reports on file sharing and usage of “Everyone except external users”.

    2. SharePoint Advanced Management Features

    SharePoint Advanced Management provides additional content management features to help organizations prepare for integration with Copilot. These features include restricting access, preventing oversharing, and cleaning up unused sites.

    Key features and configuration:

    To restrict access at the site level:

    • Restrict access to SharePoint sites to only users in a specific group.
      • Activate the access restriction with the command:
      • Set-SPOTenant -EnableRestrictedAccessControl $true
      • Add restricted groups:
      • Set-SPOSite -Identity <siteurl> -AddRestrictedAccessControlGroups <comma separated group GUIDs>
      • This prevents unauthorized access and restricts sharing with users outside of specific groups.

    Restricted Content Discovery:

    • Identify sites at high risk of oversharing and protect them with limited content discovery.
      • Activate with the command:
      • Set-SPOSite -Identity <siteurl> -RestrictContentOrgWideSearch $true
      • This setting prevents the content of these sites from appearing in organizational search or in Microsoft 365 Copilot Business Chat without affecting existing permissions.

    To manage unused sites:

    • Regularly scan and clean unused sites to reduce the risk of outdated or uncontrolled content.
      • Use the site activity reports and oversharing reports provided by SharePoint Advanced Management.

    To establish a restricted access policy:

    • Establish a restricted access policy for business-critical sites to provide an extra layer of security.

    Recommendations:

    • Conduct regular site access reviews to ensure that all sites have valid owners.
    • Use site activity reports to identify unused sites and archive or delete them.
    • Restrict access to sensitive sites to only certain groups, and check the membership of those groups regularly.

    Figure 2: Configure site-level restricted access in SharePoint.

    3. Restricted SharePoint Search

    Restricted search in SharePoint allows organizations to specify a list of allowed sites that are available for organizational search and Copilot experiences. This reduces the risk of revealing sensitive information and improves the quality of search results.

    Configuration steps:

    To activate Restricted Search:

    Understanding the impact on user experience:

    • Search results are limited to allowed sites, frequently visited sites, sites that users have permissions to, and recently accessed files.
      • The restriction can affect the overall search experience, even for users who don’t use Copilot.

    Recommendations:

    • Carefully select sites in the allowlist to ensure that only business-critical or frequently used sites are included.
    • Regularly update the list of allowed positions to reflect changes in organizational structure or needs.
    • Notify users of changes to the search experience to reduce confusion.

    Conclusion

    SharePoint advanced management using Microsoft 365 Copilot and SharePoint Advanced Management enables organizations to better control content, reduce the risk of oversharing, and improve the search experience. By following the configuration steps and recommendations described above, organizations can ensure a secure, compliant, and efficient use of SharePoint and Copilot. Regularly checking your settings, using limited search, and educating your users are key to long-term success.

    In case you are also interested in Microsoft partner solutions, for the overview or management of the M365 environment, such as e.g. DeliverPoint from LightningTools or SyskitPoint from Syskit, you can contact us and we will arrange a demo.

  • Fixing Upgrade Problems in SharePoint SE 2025

    Recently I have upgraded another client to SharePoint SE version, from SharePoint 2013.

    The initial upgrade we did was with the SP SE 2025 September CU and all upgrade went through smoothly.

    After the testing phase and before production, we installed November 2025 CU for SharePoint SE. Once we started to mount Content databases to SharePoint Servers, errors began to appear.

    The type initializer for ‘Microsoft.SharePoint.OnPrem.Flighting.ECSSPFlightDataProvider’ threw an exception.

    Upgrade error log was full of errors

    Timestamp Process TID Area Category EventID Level Message Correlation
    12/18/2025 17:25:35.07 powershell (0x3E68) 0x1DD4 SharePoint Foundation Upgrade SPFeatureDefinition aj2bj INFO SPWeb Url=https://portal 4c47e4a1-0320-6034-b7db-4f45e0e22ccc
    12/18/2025 17:25:35.07 powershell (0x3E68) 0x1DD4 SharePoint Foundation Upgrade SPFeatureDefinition aj2bj ERROR Feature upgrade action ‘CustomUpgradeAction.LocalizeVisibleMicroFeedFieldDisplayNames’ threw an exception upgrading Feature ‘MySiteMicroBlog’ (Id: 15/’ea23650b-0340-4708-b465-441a41c37af7′) in Web ‘https://portal&#8217;: The type initializer for ‘Microsoft.SharePoint.OnPrem.Flighting.ECSSPFlightDataProvider’ threw an exception. 4c47e4a1-0320-6034-b7db-4f45e0e22ccc
    12/18/2025 17:25:35.07 powershell (0x3E68) 0x1DD4 SharePoint Foundation Upgrade SPWebWssSequence2 ajy85 INFO SPWeb Url=https://portal 4c47e4a1-0320-6034-b7db-4f45e0e22ccc
    12/18/2025 17:25:35.07 powershell (0x3E68) 0x1DD4 SharePoint Foundation Upgrade SPWebWssSequence2 ajy85 ERROR Feature upgrade incomplete for Feature ‘MySiteMicroBlog’ (Id: 15/’ea23650b-0340-4708-b465-441a41c37af7′) in Web ‘https://portal&#8217;. Exception: The type initializer for ‘Microsoft.SharePoint.OnPrem.Flighting.ECSSPFlightDataProvider’ threw an exception. (Inner Exception: External component has thrown an exception.) 4c47e4a1-0320-6034-b7db-4f45e0e22ccc
    12/18/2025 17:25:35.37 powershell (0x3E68) 0x1DD4 SharePoint Foundation Upgrade SPManager ar143 INFO No context object 4c47e4a1-0320-6034-b7db-4f45e0e22ccc
    12/18/2025 17:25:35.37 powershell (0x3E68) 0x1DD4 SharePoint Foundation Upgrade SPManager ar143 ERROR Upgrade retry count [0]. 4c47e4a1-0320-6034-b7db-4f45e0e22ccc
    12/18/2025 17:25:35.37 powershell (0x3E68) 0x1DD4 SharePoint Foundation Upgrade SPManager ar144 INFO No context object 4c47e4a1-0320-6034-b7db-4f45e0e22ccc
    12/18/2025 17:25:35.37 powershell (0x3E68) 0x1DD4 SharePoint Foundation Upgrade SPManager ar144 ERROR Upgrade Requested by [SHAREPOINT\system]. 4c47e4a1-0320-6034-b7db-4f45e0e22ccc

    After researching and trying to figure out, what could be the issue, I came accros article on Stefan’s blog https://blog.stefan-gossner.com/2025/09/11/trending-issue-sharepoint-fixes-fail-to-install-after-installation-of-september-2025-cu/

    Although it does not specifically mention the issue with mounting a database and receiving errors, but it made enough sense to check it out. Sure enough the “System account” was member of WSS_WPG group

    After removing the account from WSS_WPG group, I ran command

    Upgrade-SPContentDatabase -Name databaseToUpgrade -WebApplication http://portal

    Sure enough, database upgrade went smoothly after that.

    Hopefully, this helps someone when upgrading database from earlier versions of SharePoint.

  • SharePoint SE Upgrade: Resolving Workflow Failures

    Recently I have upgraded another client to SharePoint Subscription Edition from version 2013. As many others, this one as well had a lot of workflows running in old environment in the SharePoint 2010 workflow mode.

    After the upgrade, workflows were not running with error “Failed to start”. Of course there were errors in the ULS logs like described in this article:

    https://blog.stefan-gossner.com/2024/12/11/resolved-trending-issue-problems-with-workflows-after-applying-september-2024-cu-for-sharepoint-2016-2019-se/

    But the issue was not actually resolved just by adding the entries to web.config and owstimer.exe.config. By the way, you can find owtimer.exe.config at path:

    C:\Program Files\Common Files\microsoft shared\Web Server Extensions\16\BIN

    So the ULS logs contained this entries

    12/18/2025 19:14:11.17        w3wp.exe (0x2464)        0x3A34        SharePoint Foundation        Legacy Workflow Infrastructure        c42q0        High        Potentially malicious xoml node:

    <ns0:RootWorkflowActivityWithData x:Class=”Microsoft.SharePoint.Workflow.ROOT” x:Name=”ROOT” xmlns=”http://schemas.microsoft.com/winfx/2006/xaml/workflow&#8221; xmlns:ns1=”clr-namespace:Microsoft.SharePoint.WorkflowActions.WithKey;Assembly=Microsoft.SharePoint.WorkflowActions, Version=15.0.0.0, Culture=neutral, PublicKeyToken=null” xmlns:x=”http://schemas.microsoft.com/winfx/2006/xaml&#8221; xmlns:ns0=”clr-namespace:Microsoft.SharePoint.WorkflowActions;Assembly=Microsoft.SharePoint.WorkflowActions, Version=15.0.0.0, Culture=neutral, PublicKeyToken=null”>   <ns0:RootWorkflowActivityWithData.WorkflowFields>    <ns0:WorkflowDataField Type=”System.String” Name=”__list” />    <ns0:WorkflowDataField

    As you can see, the error log states that the issue is actually assembly version 15.0.0.0 and not 16.0.0.0. as the Stefan’s blog post states.

    Whenever you upgrade to SharePoint SE and if you see the workflows “Failed to start”, add the following to your web.config and owstimer.exe.config and you should be fine.

    <authorizedType Assembly="Microsoft.Office.Access.Server.Application, Version=15.0.0.0, Culture=neutral, PublicKeyToken=71e9bce111e9429c" Namespace="Microsoft.Office.Access.Server.Macro.Runtime" TypeName="*" Authorized="True" />

    <authorizedType Assembly="System, Version=4.0.0.0, Culture=neutral, PublicKeyToken=b77a5c561934e089" Namespace="System.CodeDom" TypeName="*" Authorized="True" />

    <authorizedType Assembly="Microsoft.SharePoint.WorkflowActions, Version=16.0.0.0, Culture=neutral, PublicKeyToken=null" Namespace="Microsoft.SharePoint.WorkflowActions.WithKey" TypeName="*" Authorized="True" />

    <authorizedType Assembly="Microsoft.SharePoint.WorkflowActions, Version=16.0.0.0, Culture=neutral, PublicKeyToken=71e9bce111e9429c" Namespace="Microsoft.SharePoint.WorkflowActions.WithKey" TypeName="*" Authorized="True" />

    <authorizedType Assembly="Microsoft.SharePoint.WorkflowActions, Version=15.0.0.0, Culture=neutral, PublicKeyToken=null" Namespace="Microsoft.SharePoint.WorkflowActions" TypeName="*" Authorized="True" />

    <authorizedType Assembly="Microsoft.SharePoint.WorkflowActions, Version=15.0.0.0, Culture=neutral, PublicKeyToken=null" Namespace="Microsoft.SharePoint.WorkflowActions.WithKey" TypeName="*" Authorized="True" />

    Hope this helps someone when upgrading SharePoint.

  • back in 2013 a web part was published on Codeplex which was called “ClaimsViewerWebPart”. I do not know who the author was, but since I stiil find it a really useful web part I decompiled the code and made a new project to support SharePoint 2019 and Subscription Edition.

    Installation

    To install a solution you need to open SharePoint Management Shell and run commands

    Add-SPSolution -LiteralPath c:\temp\Xnet.SP.ClaimsViewerWebPart.wsp
     
    Install-SPSolution -Identity Xnet.SP.ClaimsViewerWebPart.wsp -GACDeployment -WebApplication http://[mywebapp]
    

    Activation

    Once solution is installed, you can activate the web part and add it to your page.

    In site collection administration, you need to find “Xnet – ClaimsViewerWebPart” feature and activate it.

    Once activated, you can create a new page and add a web part that is found under Xnet category

    When web part is added to the page, it will render all claims related to the currently logged on user account.

    This web part is really useful when using SharePoint with OIDC and any other Idp which is not SharePoint default (e.g. Windows).

    Source code

    You can find source code for the web at https://github.com/Rob3r70/ClaimsViewerWebPart

    Direct download WSP

    Direct wsp download is available at: https://github.com/Rob3r70/ClaimsViewerWebPart/blob/main/Xnet.SP.ClaimsViewerWebPart.wsp